How to Compress Video Files and Maintain the Quality
Are you wondering how to compress a video? It is often somewhat annoying to get notifications like “file too large” when uploading a video file on social media or any other media outlet. We all know that compression of large video files to make the video smaller generally reduces the quality of the files being sent.
When comments, appraisals, and approvals are needed from clients or collaborators, it is essential to give the best quality video files to the recipient to reduce the criticism that may be gotten from viewing the video file. Now, to the main point, is it possible to compress video files without losing the quality? Absolutely!
There are a few ways video files can be compressed, and certain scenarios favor certain procedures. We’ll take you on a step-by-step guide, as well as advise you on what video editor to use when you want to compress a large video file to smaller file size while maintaining high quality.
Online Reduction of Video Resolution
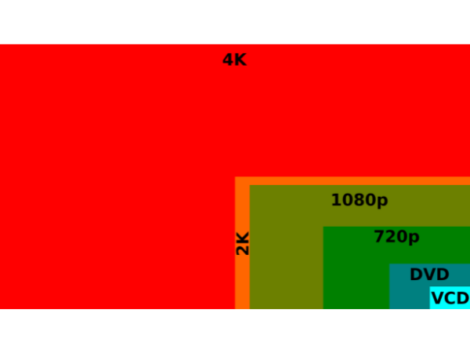
Photo Credit: Wikipedia
Many people often hear the term “resolution” but have little or no idea what it is. Resolution is also known as “aspect ratio,” It is defined as the number of pixels on display. The resolution of a video is directly proportional to the quality of the video.
This means that the higher a video resolution, the higher the video quality, and the lower the resolution, the smaller the size. HD video usually has a resolution of 1920 × 1080 pixels, and lowering the resolution reduces the quality of the videos.
Now here’s the trick. To compress a video to a resolution of 1280 × 720p or 854 × 480p makes little or no difference to the individual receiving the video, as long as the compression is done online. This goes a long way in maintaining the quality of videos, especially when the video is meant for email sharing etc.
It is not encouraged to reduce video resolutions to less than 480p. Some individuals even go as low as 640 × 360p, which makes no substantial difference to the individual receiving the video file.
Below are some handy video compressor applications that can be used to reduce video files;
VLC player
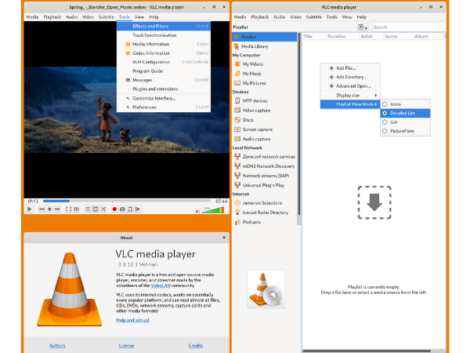
Photo Credit: Wikipedia
- Download, install and open the VLC player
- Got to Media, then click on Convert/Save
- Click on Add: This enables you to select your video file(s)
- Click on Convert/Save: this enumerates a list of options from which one can choose.
- Choose your most preferred option: it is important to note here that this app offers useful suggestions, e.g., MPEG4 1080p TV/device, YouTube HD, etc.
- Once your preferred option has been selected, select your file destination, click on Save and click start.
Shotcut
- Download, install and open the shortcut app
- Go to Export
- A list of compression options will pop up
- Select your most preferred choice
- Resolution and Aspect ratio can manually be used to reduce the video size and proportion.
- Click on export video
- QuickTime (Most preferred for Mac OS users)
- Click on File, select your video and click on it
- Click on Export As
- A list of options will pop, but a minimum of four options can be picked: 4000p, 1080p, 720p, and 480p. Select a smaller file format than the original file format
How to compress a video and download it in lower quality

Low resolution or low-quality files can be gotten from video editing software. Adobe Premiere Pro is one app that provides top-notch quality for video resolution reduction and can compress videos adequately.
Final Cut Pro is also an awesome app in terms of providing the best quality video qualities in the midst of low video resolution.
Some points to note in doing this include;
- Using the MP4 file format when downloading videos retains the standard video quality and reduces the file’s size.
- Resolutions of 720p and above sit well with a lot of people. But the resolution you use should be suitable for the video you intend to send and should depend on the screen the viewer will use to view the video file.
- When creating a video, lots of motion and transitions tend to increase the size of your video file.
- Audio files can be compressed while exporting them in a video project.
- Frame rates of 24 – 30 is the standard frame rate used for video files of different sizes.
How to Compress a Video File to a .zip File
Photo Credit: Wikipedia
This is one of the easiest ways to compress a file. The file is reduced greatly, not in every instance, but the quality is preserved. It is pertinent to state that this procedure is one of the most efficient methods to share videos. Listed below is the stepwise guide on how to compress videos.
- Right-click on the video file
- Click on send to, then select the compressed (zipped) folder
- Follow the outlined steps
For Mac OS users;
- Right-click on the video file
- Select Compress (filename)
- Follow the steps, and the file will be compressed
Some video files will still be too large to input in emails despite all these. The following remaining steps may be useful in such situations.
Sending videos as links instead of uploading them

This is another awesome consideration when sharing videos but still maintaining the top-notch quality of such videos. There are many places where videos can be uploaded and shared without stress.
- Cloud services: These are now among the most popular and most effective ways of sharing video files. Some of the most popular ones include Google Drive, Dropbox, OneDrive, etc. One needs to drag the file to the required app and drop it there.
- Apps like WeTransfer or ShareIt can also come in handy when sharing compressed files to a sharing service.
- Videos can be uploaded on YouTube and put in the “private” or “unlisted” category and the link shared with the desired recipients.
Related Articles
Online Trimming of Video Files

After all, is said and done, if compressing a video file doesn’t help, or the video contains a lot of motions, graphics, transitions, and other things that will increase the size of the video, the video can be trimmed as well.
A lot of unnecessary scenes that don’t need to be seen can be removed from the video before sending it to the recipient. Many editors like iMovie Maker or QuickTime on Mac OS or Windows Movie Maker on Windows OS can be used. The most convenient way to do this on the web is within InVideo’s Free Editor. Below is a guide on using InVideo to trim and compress videos.
- Sign up and log in to the InVideo account
- Select the black canvas, then choose the aspect ratio that suits your video, then click “make a video.”
- On the next display screen, click on upload media and select the video one wishes to trim
- Trim your video manually.
- Click on done, then download and share and export.
- Click on download finally.
Conclusion
The above are easy ways to compress your large video files regardless of the file type. These edits can be achieved perfectly without dealing with a reduction in video quality.
Do well to attempt the above and follow whichever is most suitable for you and your collaborators.