How To Use Split View on a Macbook
Ever wondered how you could multitask in just two clicks; well, here’s how.
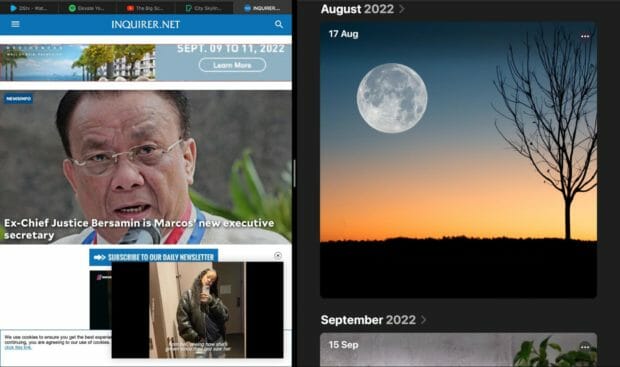
You can achieve a lot when you multitask and work on two apps simultaneously on your MacBook computer. This is easily achievable with Split View, a feature that allows you to work on two apps side by side.
You can also do this automatically, as Split View divides the screen into two halves. You can also resize these apps manually and allocate more screen space to your desired app.
What is Split View on MacBook?
Split View is a feature that allows users to work on two apps at the same time on their Mac. A lot of apps on the MacBook support this amazing feature. With this feature, users can explore two apps at the same time, and achieve their desired results.
Why use Split View?
Working on more than one app is exciting, as it allows you to multitask and increase productivity. This feature also comes in handy if you need data from one app in a second. Because these apps are aligned side by side, it is easy to work on everything at once.
In addition to this, Split View temporarily hides all other windows, meaning you would be able to focus on both apps without distractions and execute perfectly. If you need to access any other app, all you need to do is exit Split View.
We’ll show you how to activate and exit Split View on your Mac.
How to use Split View
For you to use Split View on your Mac, both apps you’re trying to work with must support Split View. Several Apple apps like Photos, Maps, and Safari support this feature.
Our step-by-step procedure would be done on a macOS Monterey; however, it is pretty much the same for Catalina or later.
- Right-click on the green button at your windows’ top left corner.
- Click on Tile Window to Left of Screen or Tile Window to Right of Screen.
- Once you select these options, you will get the option to select the second app you want to work with.
When you’re in desktop mode, click and drag your windows to swap sides. You can also resize each window to your desired size.
How to exit Split View
Swipe left with four fingers when you’re done using Split View or want to shut it out temporarily. This way, you get to another window.
Done working? Here’s how to exit Split View:
Click on the top of one of the open apps, then right-click the green button. This will activate fullscreen mode for that window and exit Split View.
However, if you want to minimize Split View and use other apps, you can swipe right with four fingers on the trackpad and then get on with other apps on your Mac.
Conclusion
Split View is an amazing feature. You will find this helpful if you love to work on different tasks simultaneously or need two apps to work simultaneously to execute a project.
Apple continues to add different exciting features to increase productivity and user experience on the MacBook, and Split View stands out as one of the most thoughtful ones.
Read more: How To Unpair An Apple Watch

